
Read and arrange Home
Home shows one tile per category with its latest value, unit and when it was measured.
- Tap a tile to open the history of that reading. ECG and Urine Tests open their own lists.
- Tap + on a tile to log that kind of reading by hand.
- Touch and hold the six dots on the left of a tile, then drag it up or down to change the order. The new order is saved when you let go.
- To show or hide categories, tap Manage Home Screen at the bottom of Home, or open Settings and choose Home screen. Select all and Clear all change every switch at once.
Home categories39
- Reminders
- A1C
- Activity
- Alcohol Content
- Auscultation
- Blood Cholesterol
- Blood Coagulation
- Blood Creatinine
- Blood Glucose
- Blood Ketone
- Blood Lactate
- Blood Pressure
- Blood Uric Acid
- Calories Consumed
- Carbohydrates
- ECG
- Exercise
- Glucose Ketone Index
- HDL Cholesterol
- Heart Rate
- Heart Rate Variability
- Hematocrit
- Hemoglobin
- LDL Cholesterol
- Medication Intake
- Mole Scan
- Note
- Oxygen Saturation
- Respiration Rate
- Sleep
- Spirometry
- Stress Level
- Temperature
- Total Serum Protein
- Triglycerides
- Urine Tests
- Water Intake
- Weight
- White Blood Cells
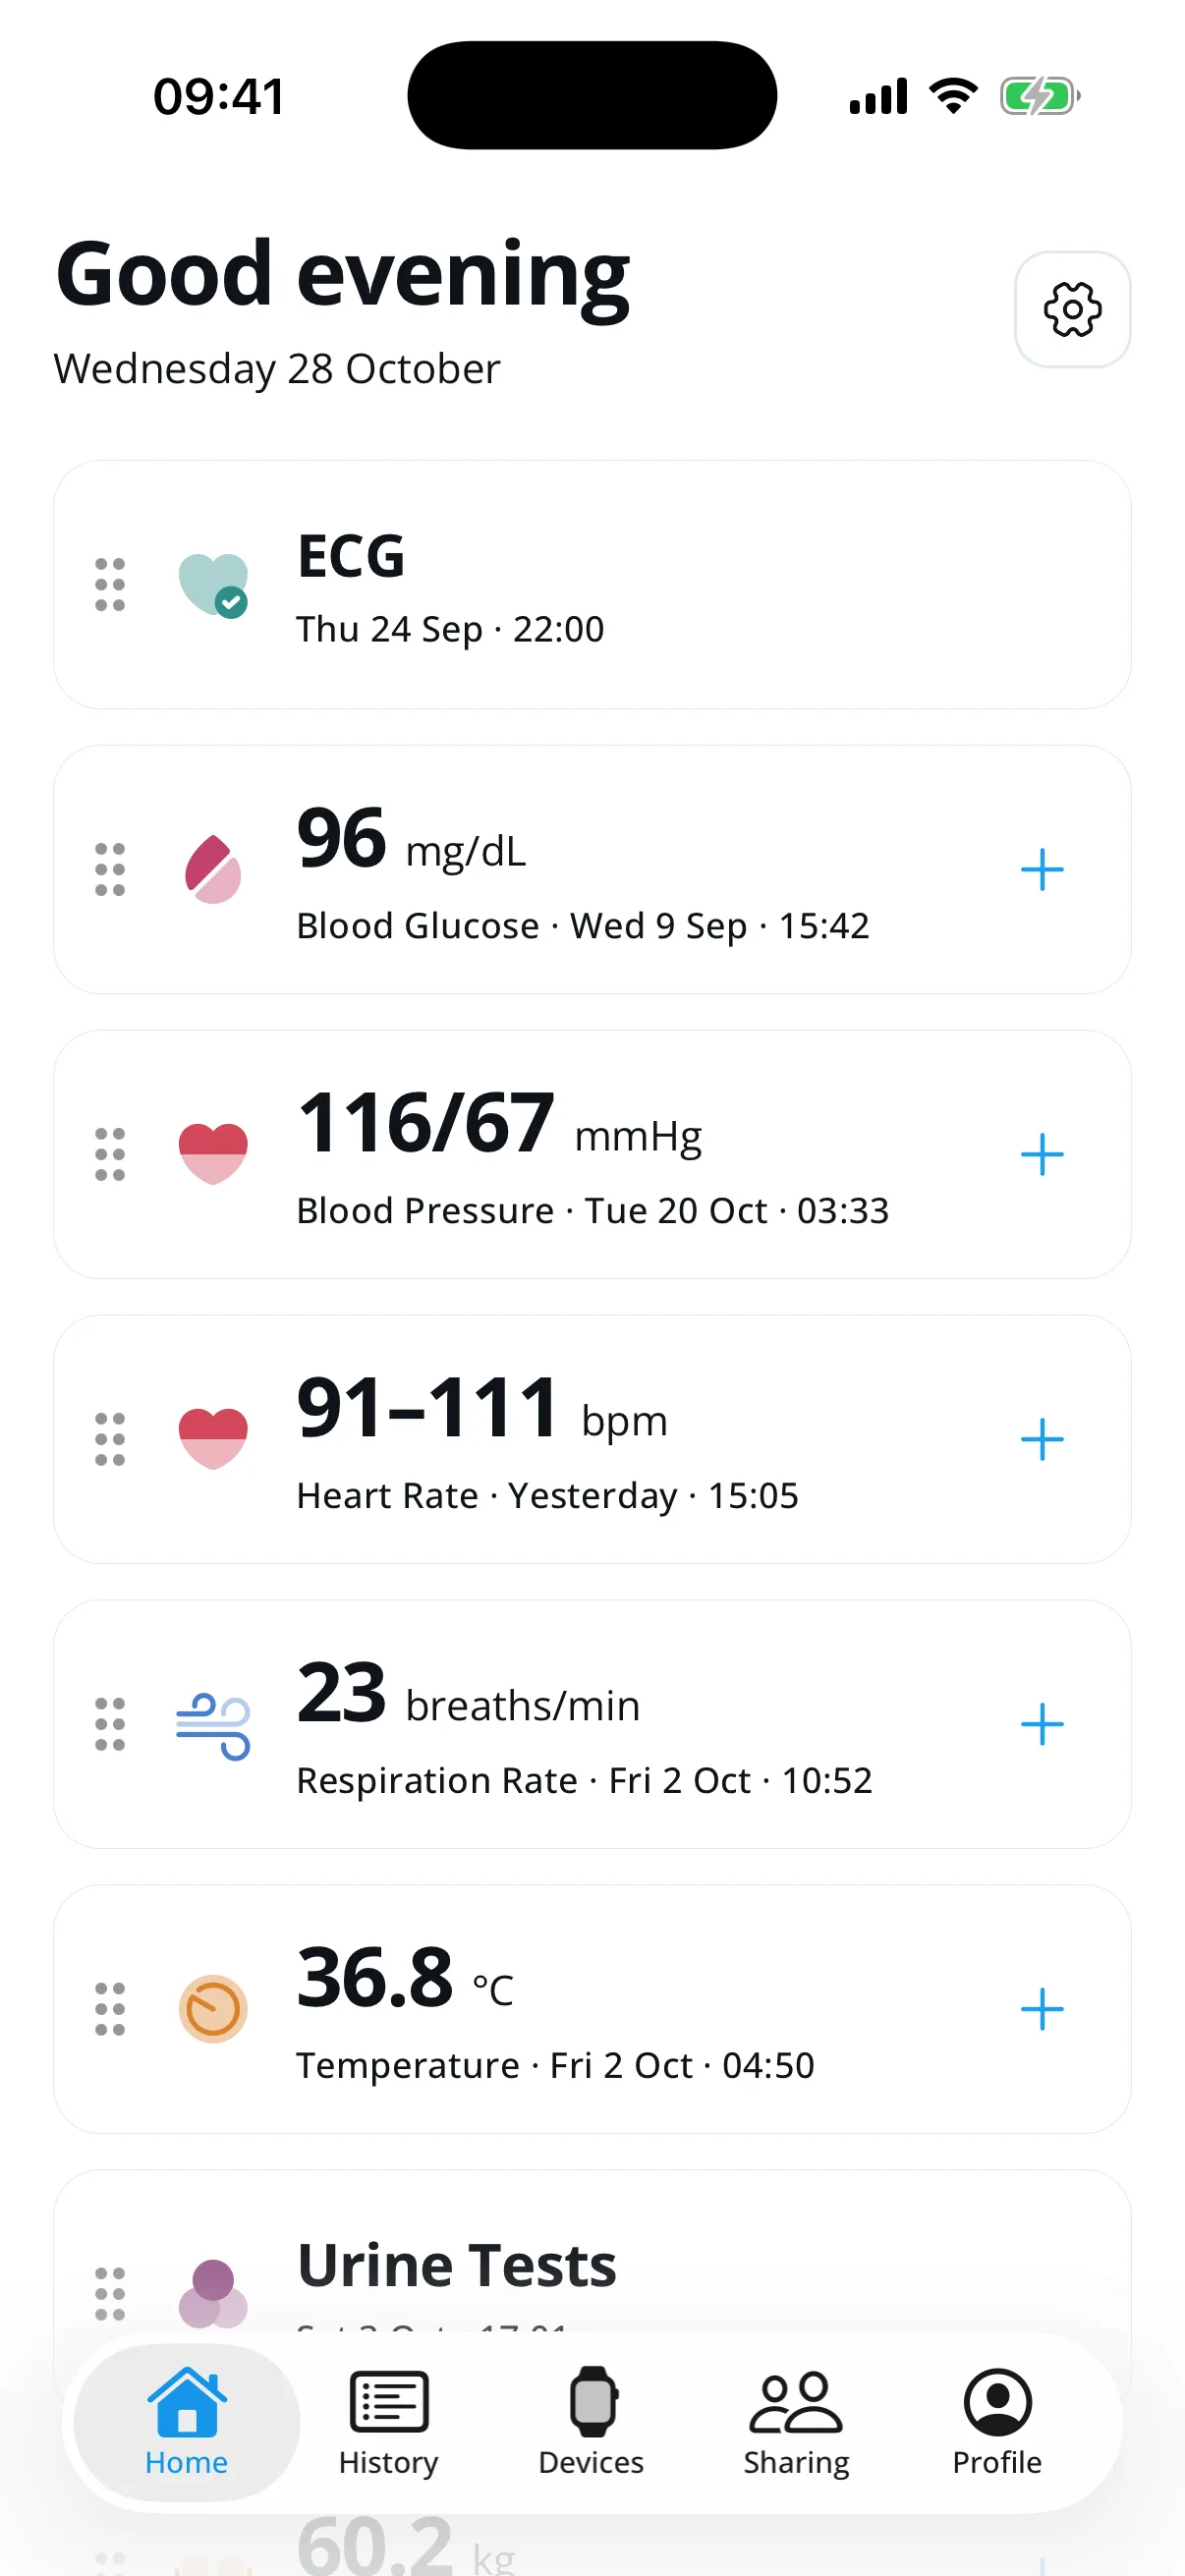
Home with example readings. Each tile shows the latest value and when it was measured.
The gear opens Settings.
Drag the six dots to move a tile up or down.
Tap + to log that kind of reading by hand.
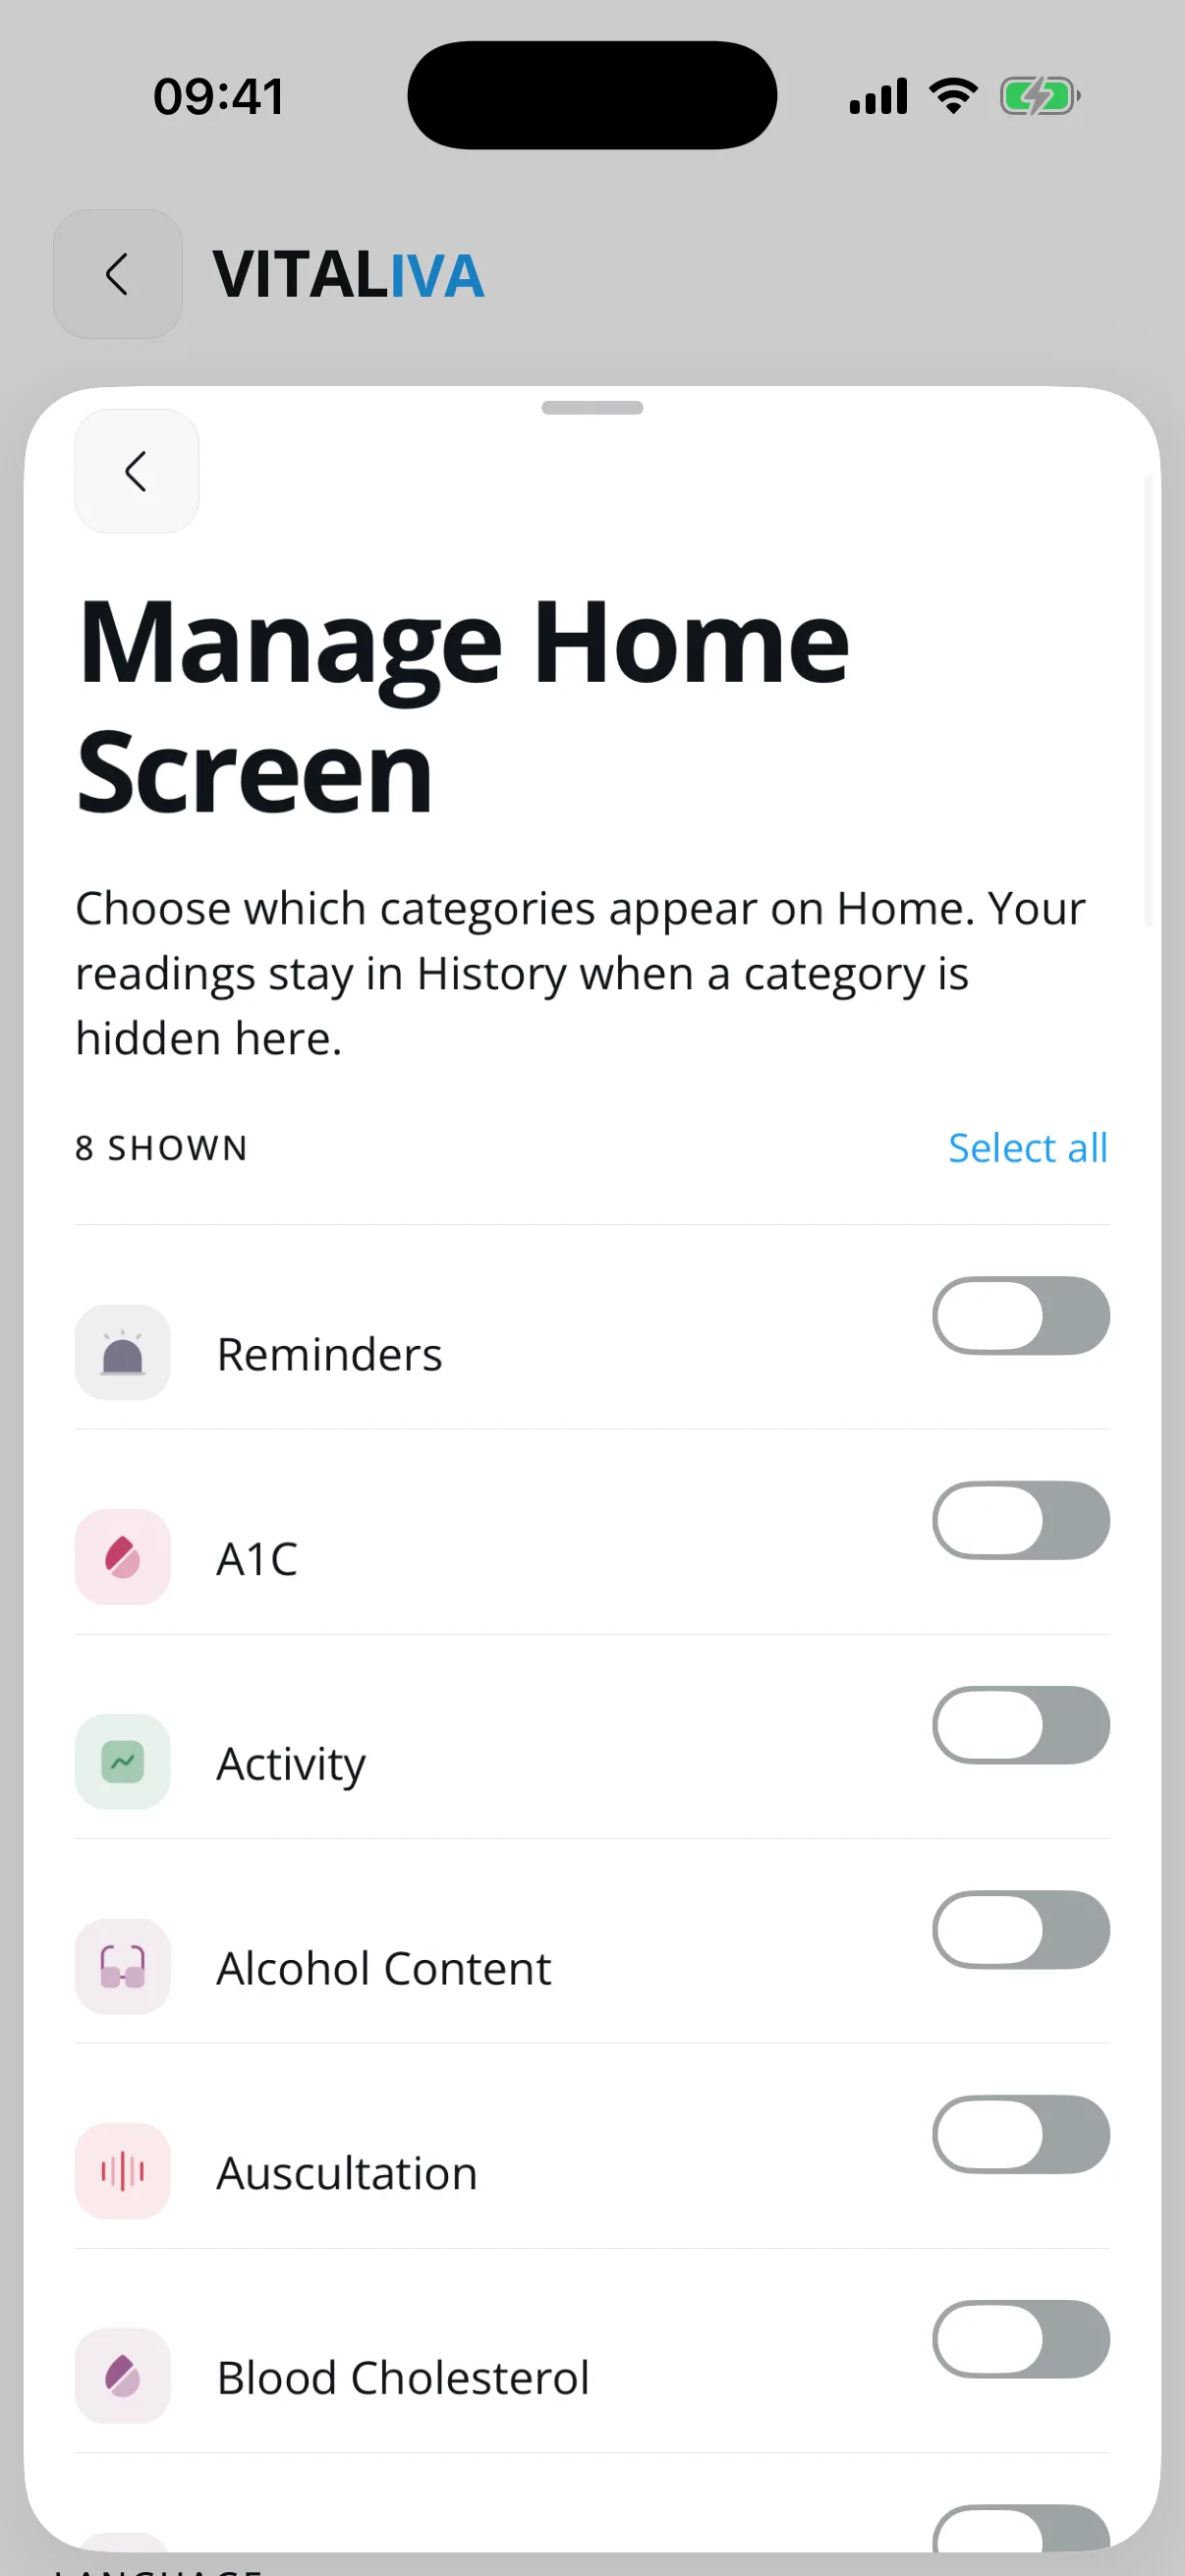
Manage Home Screen opens as a sheet. Eight categories are shown in this example.
The count shows how many categories are on Home.
Each switch shows or hides one category.
Select all or Clear all changes every switch at once.
Add a reading by hand
Manual entry is useful for a measurement that did not arrive from a connected monitor or phone-health platform.
- Tap + on a Home tile. The form opens with that measurement type selected; you can switch types in the row at the top.
- Enter the value you actually measured. Blood pressure requires systolic and diastolic values; pulse is optional.
- Choose when you took the measurement: Now, 15 min ago, 1 h ago, or 3 h ago.
- Review the units and values, then tap Save reading. The app checks required fields and basic value constraints before saving.
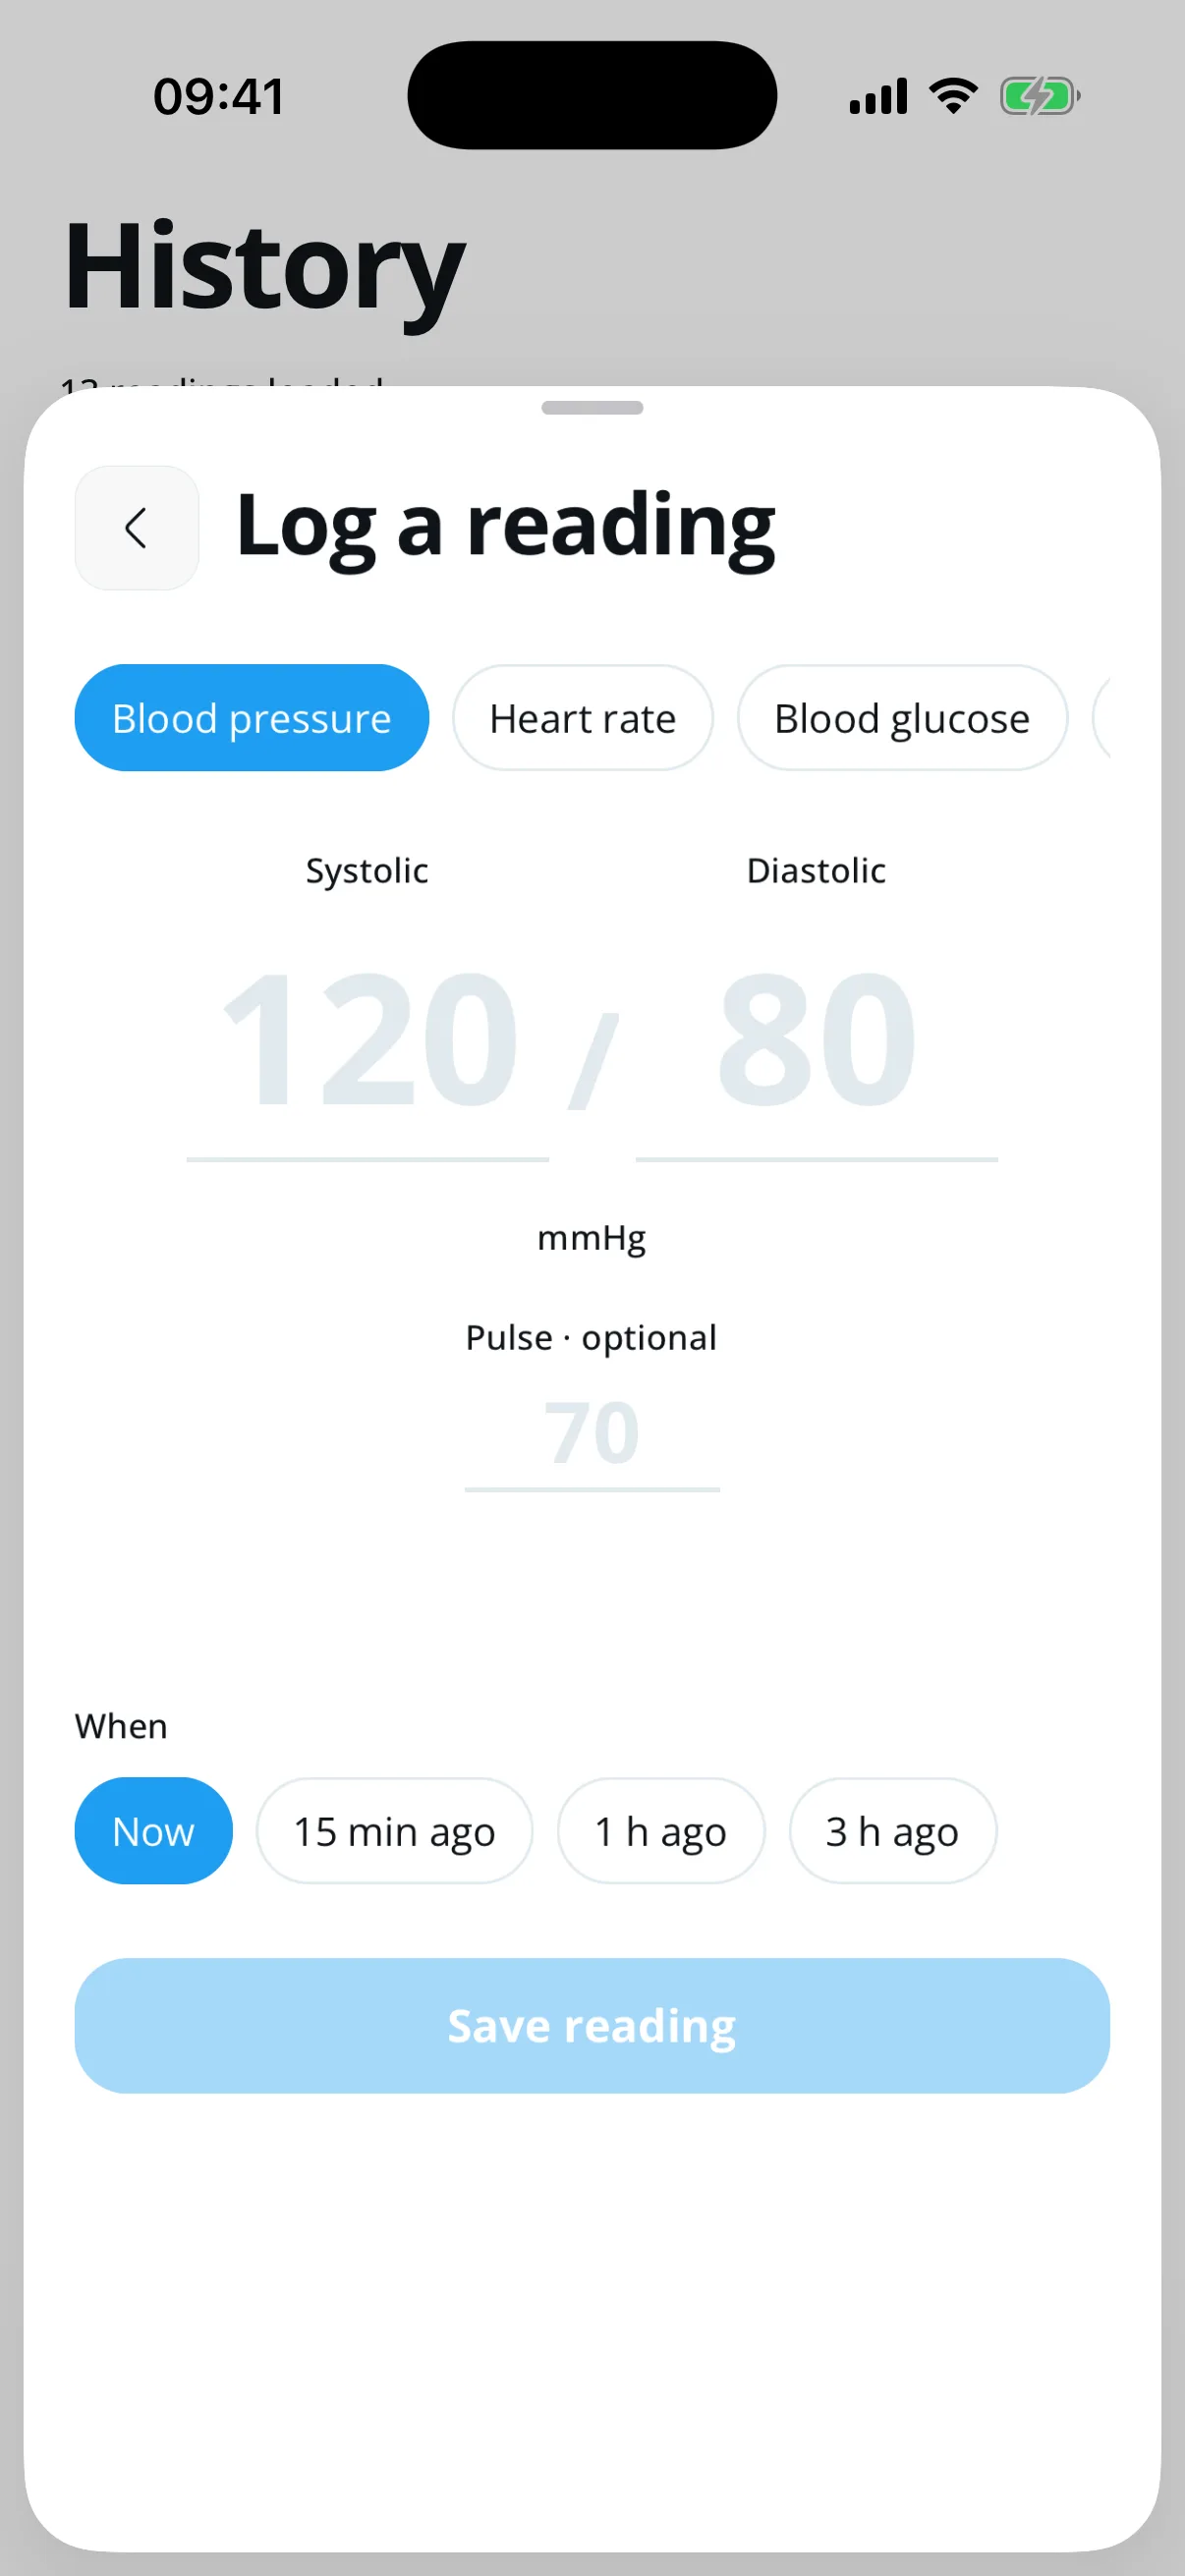
The log sheet. The pale 120, 80 and 70 are placeholders, not saved values.
Choose the type of measurement in this row.
Enter your own measured values; pale numbers only show the format.
Choose when you measured, then tap Save reading.
Find readings in History
History brings manual, monitor, and phone-health observations together in date order, with the recorded source kept alongside each entry.
- Open History to see entries grouped under their day.
- Pull down to refresh the list. When older entries are available, choose Load more readings to fetch another page.
- Tap a reading to open that vital’s observation list. It is filtered to that vital and keeps loading older observations in pages.
- Check the time, unit, and source before comparing entries. A monitor or phone-health import can use a different measurement time than the time it arrived in Vitaliva.
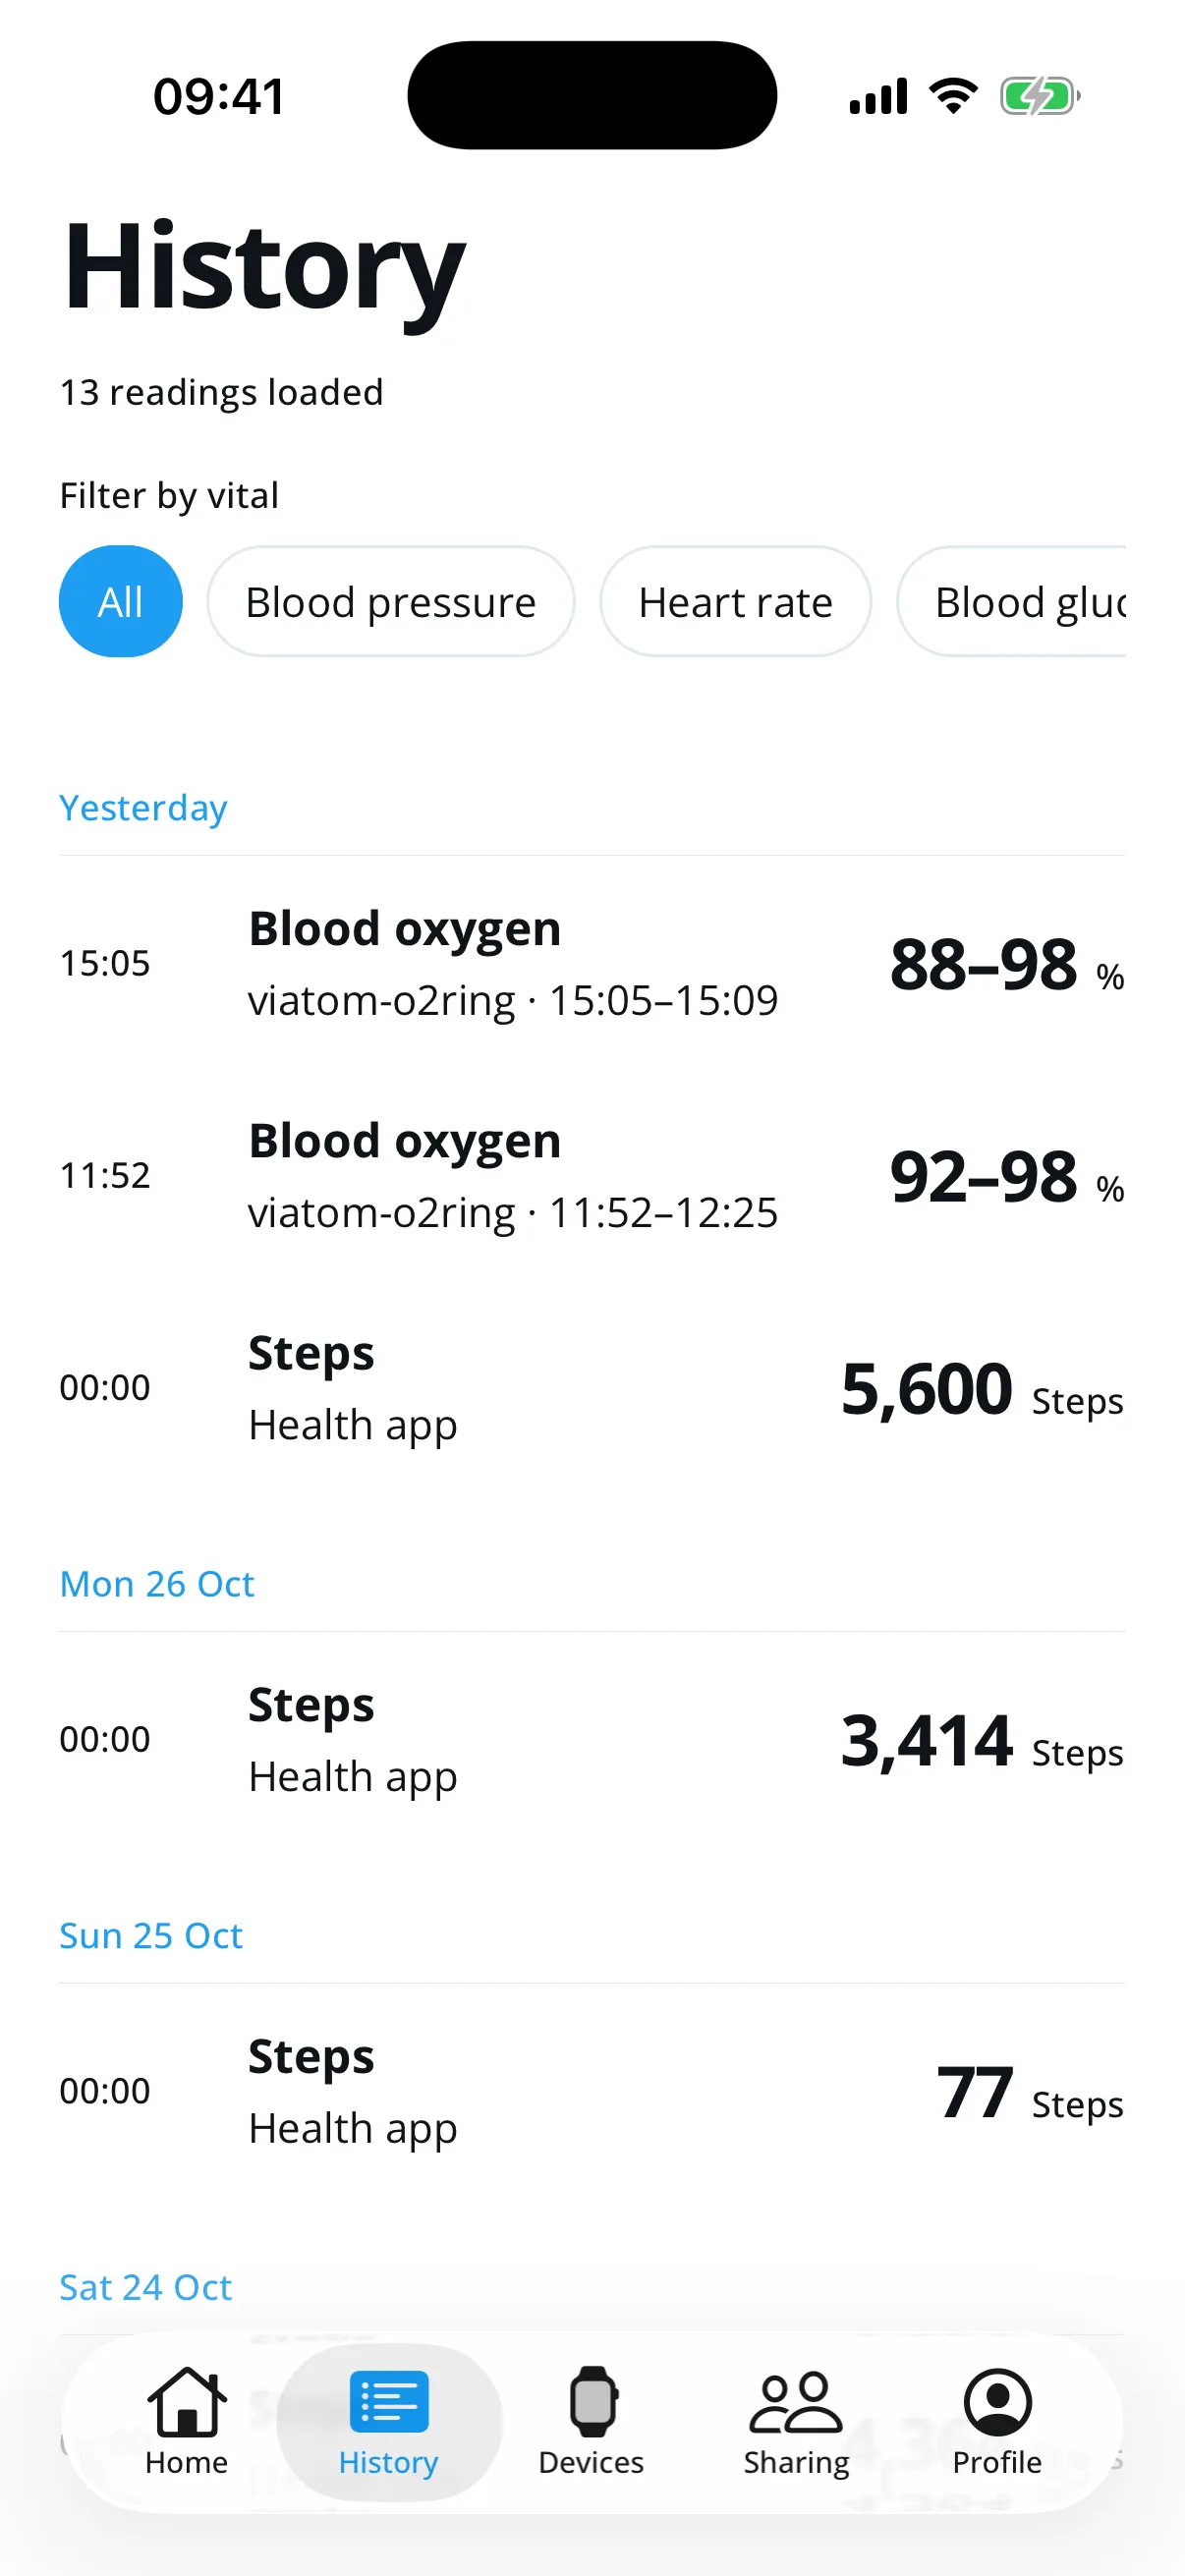
History on iPhone with example readings. The All filter shows every type together.
Use the filter row to show one vital type or all types.
Readings are grouped by day, with their source and value.
The bottom bar moves between Home, History, Devices, Sharing and Profile.
Connect monitors and wearables
Devices has two sections: Bluetooth, for monitors that pair with your phone, and Wearables, for the health apps and accounts Vitaliva imports readings from.
- Tap + at the top to pair a supported Bluetooth monitor. Turn on its pairing mode and keep it close to your phone. Paired monitors are listed under Bluetooth.
- Some monitors must be disconnected from their maker’s app before Vitaliva can pair with them. If Bluetooth is off or not allowed, Devices offers a link to your phone’s Bluetooth settings.
- In a browser, Chrome or Edge on a computer or an Android phone can pair monitors too: tap +, then Choose a monitor, and pick it in the browser’s list. On iPhone or iPad, use the Vitaliva app or the Bluefy browser. A browser reads a monitor only while the page is open.
- Under Wearables, open Apple Health on iPhone or Health Connect on Android, and allow only the data you want Vitaliva to read.
- Tap Connect next to Polar Flow or Oura and sign in to that account. When you finish, you return to Vitaliva. Disconnect stops new readings from that account.

Devices on iPhone with no monitor paired and two accounts connected. Android shows Health Connect instead of Apple Health.
+ starts pairing a supported Bluetooth monitor.
Paired monitors are listed under Bluetooth.
Wearables connects Apple Health or Health Connect, Polar Flow and Oura.
Share with your clinician or family
The Sharing tab gives other people read-only access to your readings. You can stop it at any time.
- Under CareCycles, enter your clinician’s name and email and tap Send invitation. If you belong to a clinic, it is shown at the top of Clinicians with access instead.
- Under Family, tap Invite Your Family, choose the categories to share and create an invite. Vitaliva shows a QR code and a link that work once, within 15 minutes. The other person must be signed in to Vitaliva.
- Everyone with access is shown as a card. Tap Stop to end their access, or Open → to view readings someone shares with you.
Settings, profile and account
Settings holds your app preferences. The Profile tab holds your account.
- Tap the gear at the top of Home to open Settings.
- Use Home screen to choose categories, Background sync to let a sync continue while Vitaliva is closed, Appearance to pick System, Light or Dark, and Language to change the app language.
- Open the Profile tab to edit your details, sign out or delete your account. A deleted account and its readings are removed for good 30 days later.
- Open this guide again from User guide in Settings. Send feedback from the bottom of Settings.
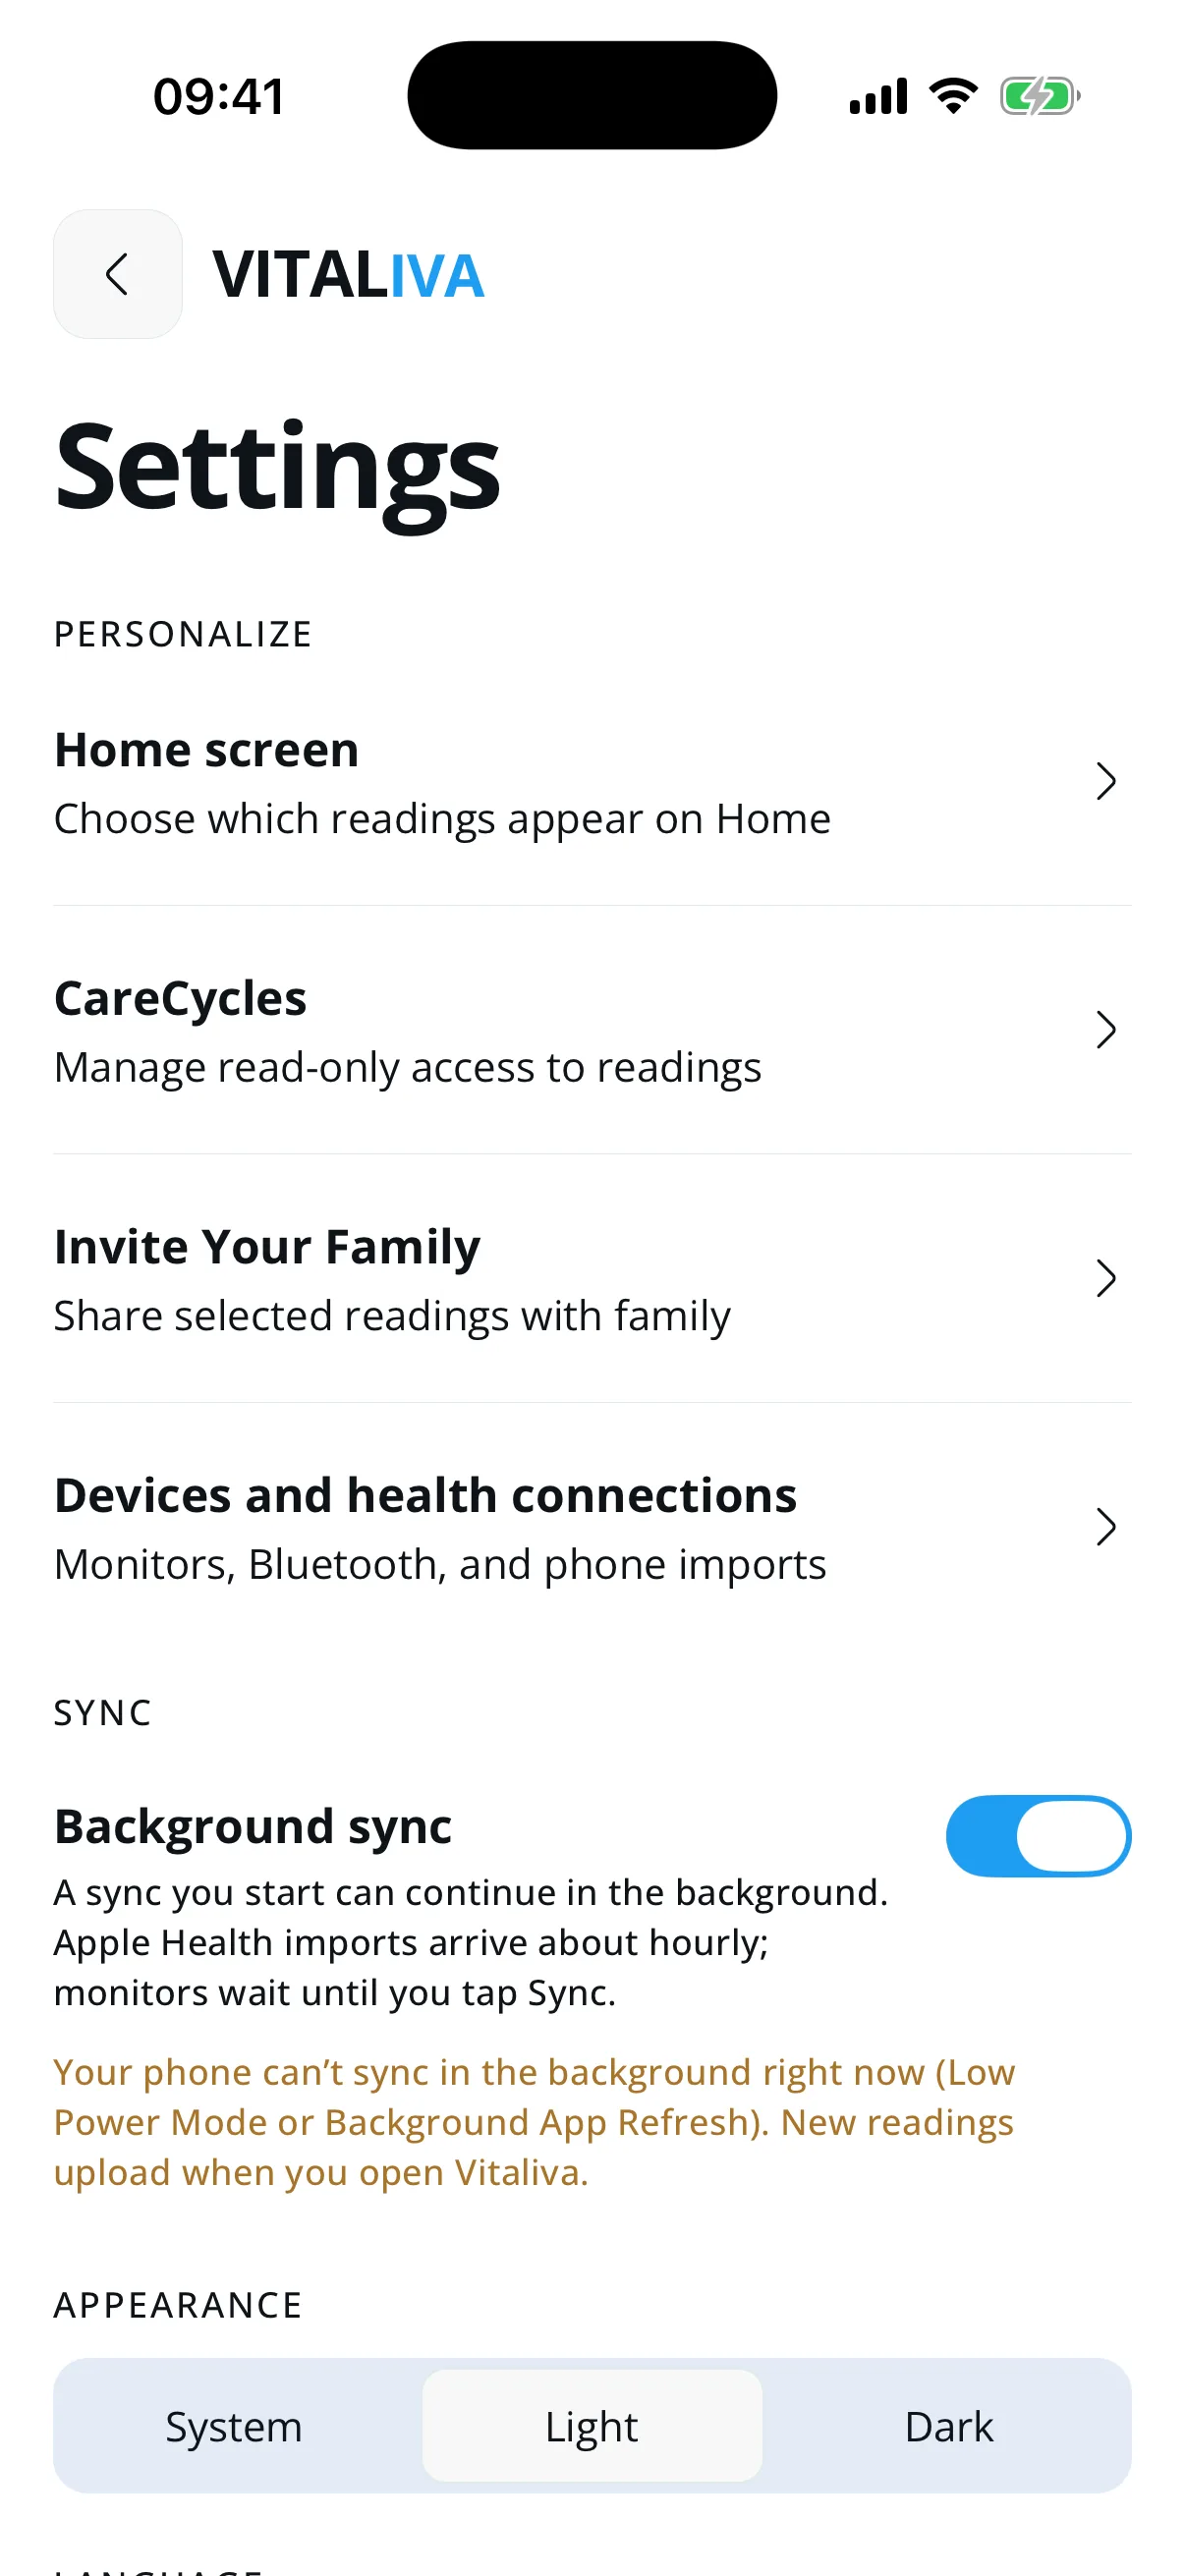
Settings opens from the gear at the top of Home.
Home screen chooses the categories shown on Home.
Background sync lets a sync continue while Vitaliva is closed.
Choose System, Light or Dark appearance.
Reading and safety notes
Vitaliva stores and displays readings with their source and time to help you keep a personal record.
- Use the measurement technique and calibration guidance supplied by the monitor manufacturer.
- Check the date, time, source, and unit before using a reading in a conversation with a clinician.
- If a result seems wrong, repeat the measurement according to the device instructions. Do not change medication or treatment based on this app.
- Contact emergency services for urgent symptoms. For non-urgent questions about a result, speak with a qualified health professional.